Recreate the Translate App [ Part 1 ]
Learn how to recreate this new IOS 14 app using SwiftUI and UITextView
Hey there,
With the recent launch of IOS 14, one of the things that caught my eye is the new translation app. I love how minimal it is. The animations are relaxing and soothing. I recreated the app and have captured the details below. Hope you can learn something from this post. If you have any ideas, feel free to drop a comment.
Breakdown
Let’s start with a breakdown of the official translate app.

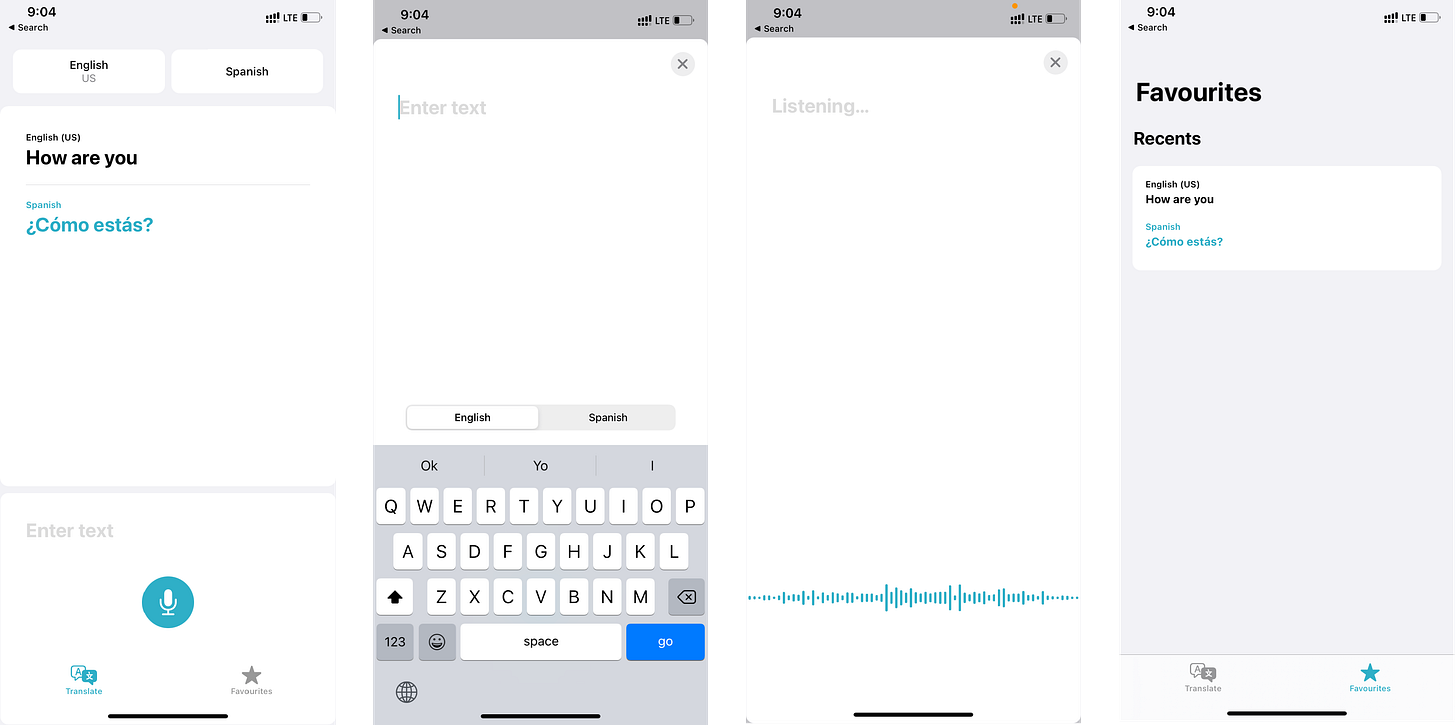
There are 2 tabs, one named translate and the other favourites.
Translate tab is divided into 4 sections.
At the top we see two buttons which are used to select the from and to languages.
The centre container displays the raw & translated text along with their respective languages.
The bottom section contains a text field with a placeholder “Enter text”
A mic button is overlaid on the bottom section. When clicked, this opens a listening view which has a static text at the top and a beautiful animation at the bottom.
Favourites tab displays recent and starred translations
Language Buttons
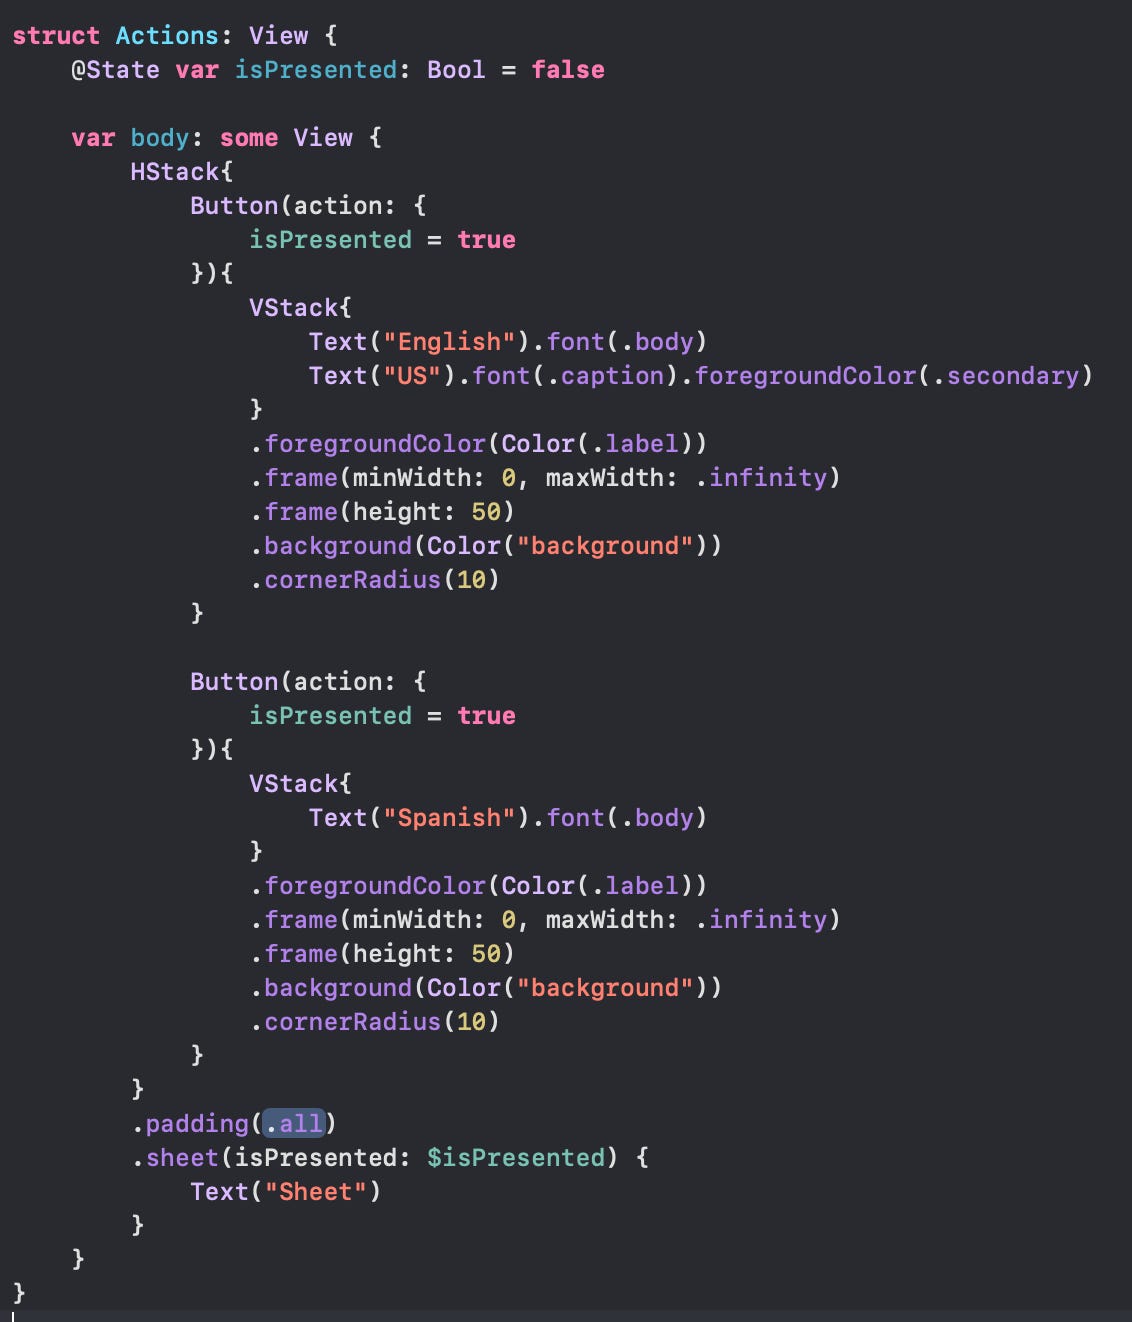
Let’s start from the top. These are simple buttons which displays a sheet when clicked.
We use a state variable
isPresentedto show / hide the sheet.We wrap the two buttons with
HStackin order to display them on the same row..frame(minWidth: 0, maxWidth: .infinity)allows our buttons to take up all the available space.

Translation View
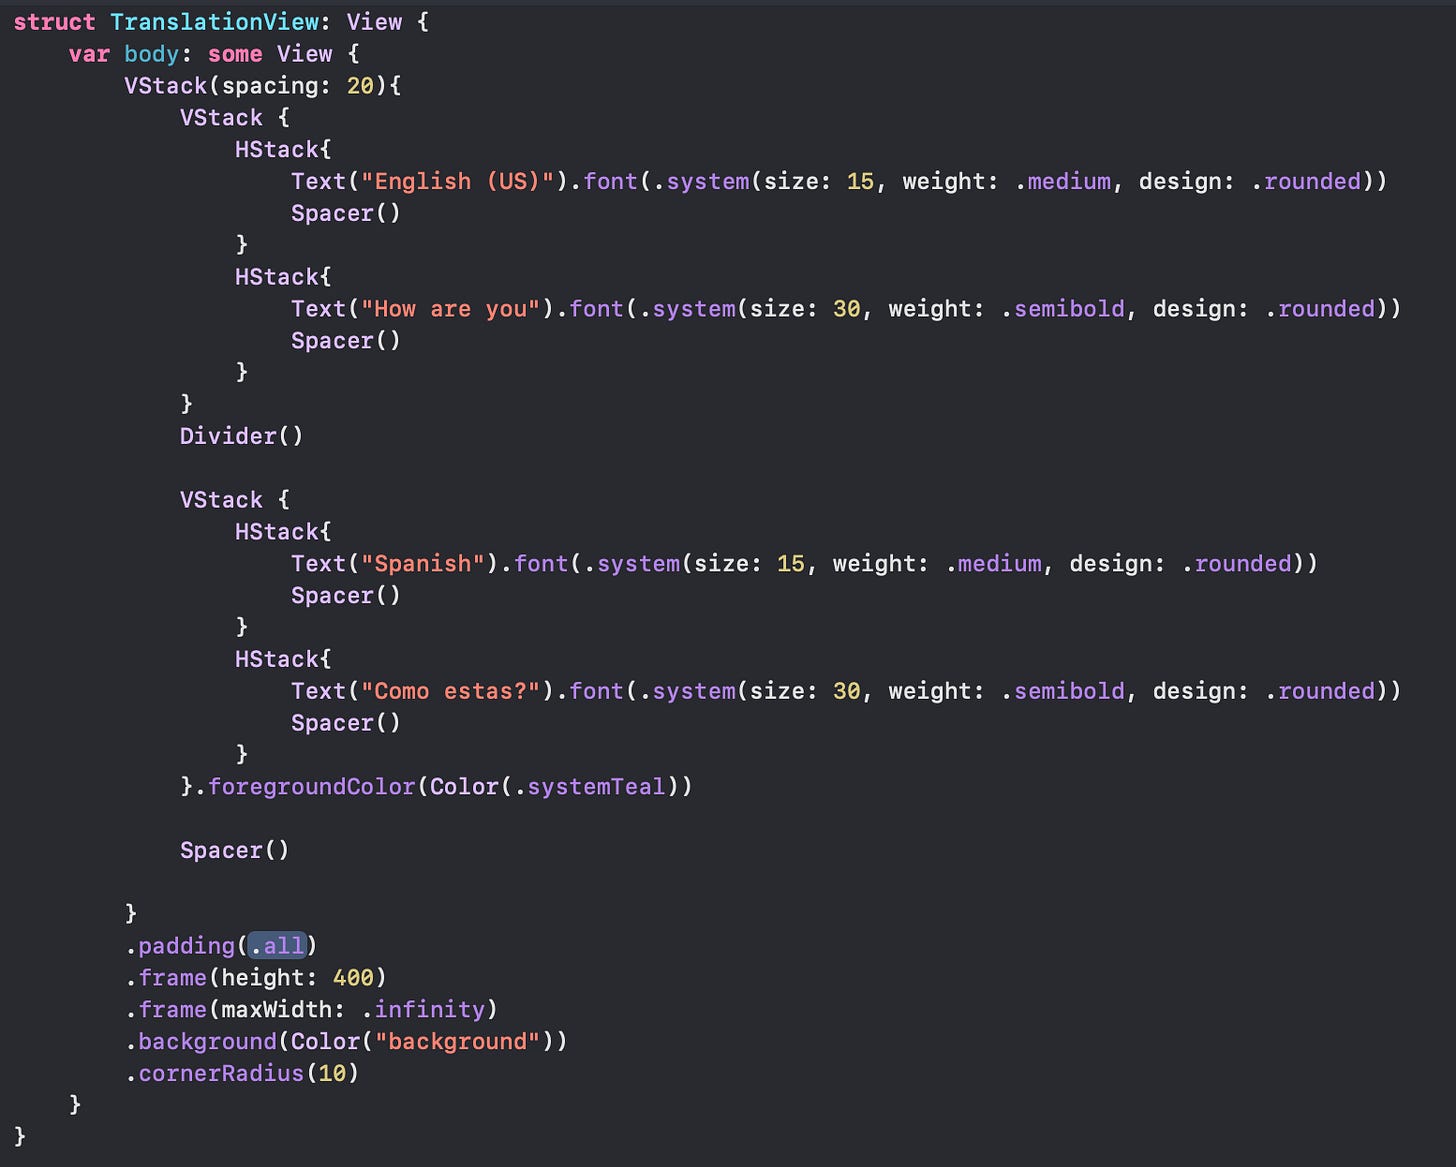
Let's start with the raw text first. These are two Text elements wrapped in a VStack. Since the text is aligned to the leading, we set the alignment property of VStack as .leading. The translated text is also created in the same way. SystemTeal is applied as a foreground colour to the translated text.
The two VStacks are wrapped in a VStack with spacing property set to 20. We also add a divider between the two inner VStacks. This creates a separation between the two sections.

Mic
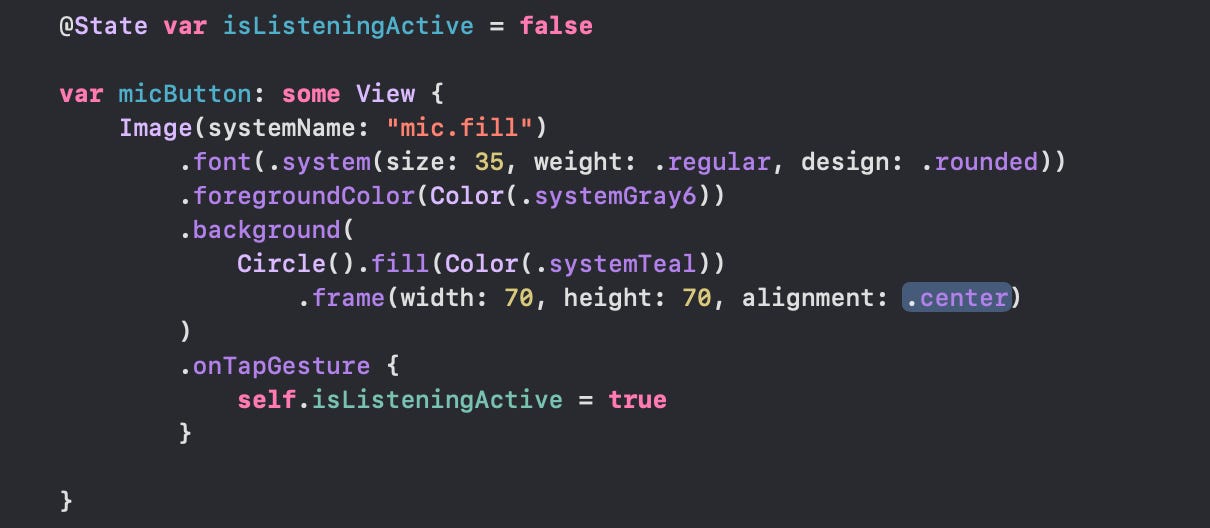
We use a state variable which we will use to show / hide the listening view. This button activates the listening view on click.

That wraps up part 1. In the upcoming posts we will talk about the editor, sheet expand animation and the listening animation.
Part 2
